 Bhavesh Kakwani
 Tindie
 Natalie
 Julien Provenzano
-
Secrets of MicroPython: How to blink an LED
12/28/2021 at 20:54 • 0 commentsThis tutorial was originally published here.
Welcome to the Secrets of MicroPython tutorial series! MicroPython is an incredible tool for rapidly prototyping and iterating on hardware projects. It's similar to Arduino but instead of using C++, which you have to re-compile each time you make a code change, it runs on the Python interpreter which allows you to run code changes immediately. The quick feedback cycle enabled by MicroPython will, I believe, power the future of embedded development.
What is the "hello world" of embedded software? Why, blinking an LED, of course! In this first tutorial, we'll get you acquainted with the fundamentals of MicroPython and more importantly, the online simulator we'll be using for all the tutorials. That's right, an online simulator! No need to feel pressured to throw down money on a box of hardware gadgets to learn MicroPython - though you are certainly welcome to when you feel ready.
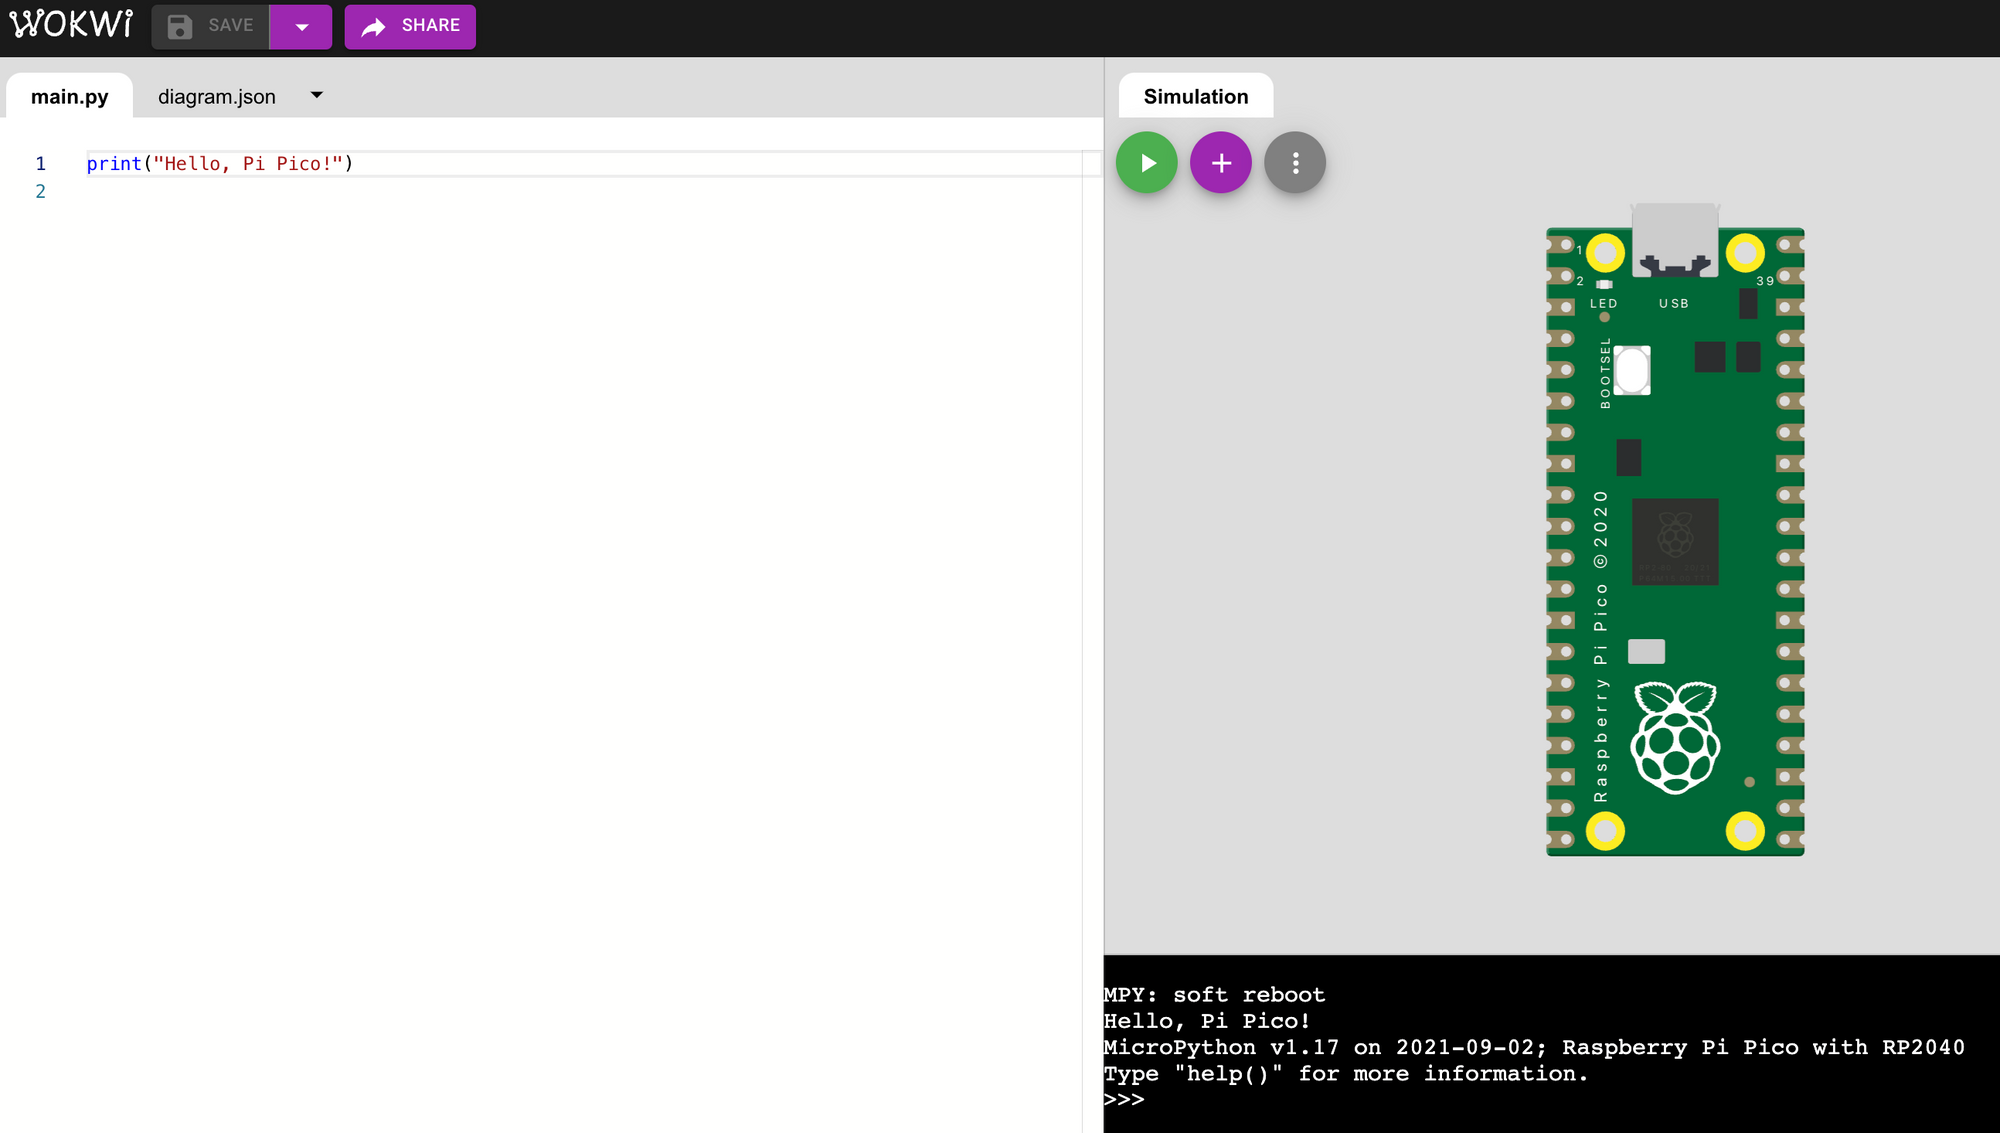
In the simulator, we are going to be writing code for a Raspberry Pi Pico. The Pico is a powerful $4 microcontroller by the makers of the Raspberry Pi, and it comes with solid MicroPython support and documentation. The simulator we'll use is an excellent online service called Wokwi, and it has a starting point for Pi Pico + MicroPython projects here. I suggest you bookmark that link so you can always quickly get started on a new tutorial or project with one click. Here's a quick overview of the simulator window.
![]()
The Wokwi simulator. The left pane is where we write MicroPython code. The right pane is where we connect hardware to the Pico using wires. On the bottom right is the console which shows printed output from our program. Press the "play" button in the top right to see it in action! If you clicked the "play" button in the simulator, congratulations - you've just run your first MicroPython program! As shown in the screenshot above, it prints out "Hello, Pi Pico!" in the console on the bottom right. But we're here for something much more interesting - blinking LEDs (aw yeah)! If you look closely, there's a small LED on the top left corner of the Pico board, with the silkscreen "LED" printed in white underneath it. But which pin is it connected to?
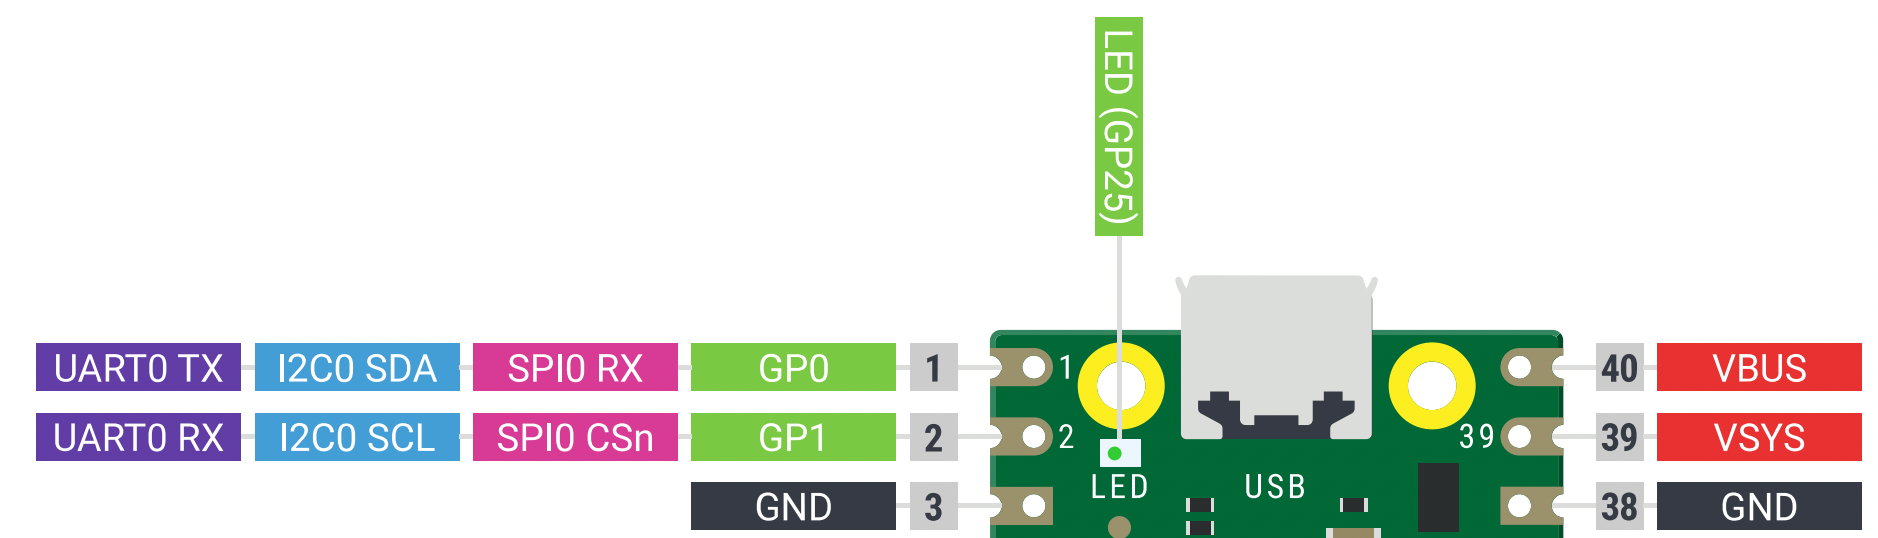
Luckily, we have Raspberry Pi Pico's excellent documentation to help us. You can snag the pinout diagram here. Save it and maybe even print it out - it will be useful for every project. Let's zoom in and have a look at how to read the pinout diagram.
![]()
Top section of the Pi Pico pinout diagram. We can see from the label at the top that the onboard LED is connected to pin GP25. So the onboard LED is on pin GP25. Take a moment here to also notice how pins 1 and 2 have multiple labels attached to them. This is common in microcontrollers and it signifies that these pins can be used for any one of these labeled functions, and that it's up to the programmer to decide which one will be active.
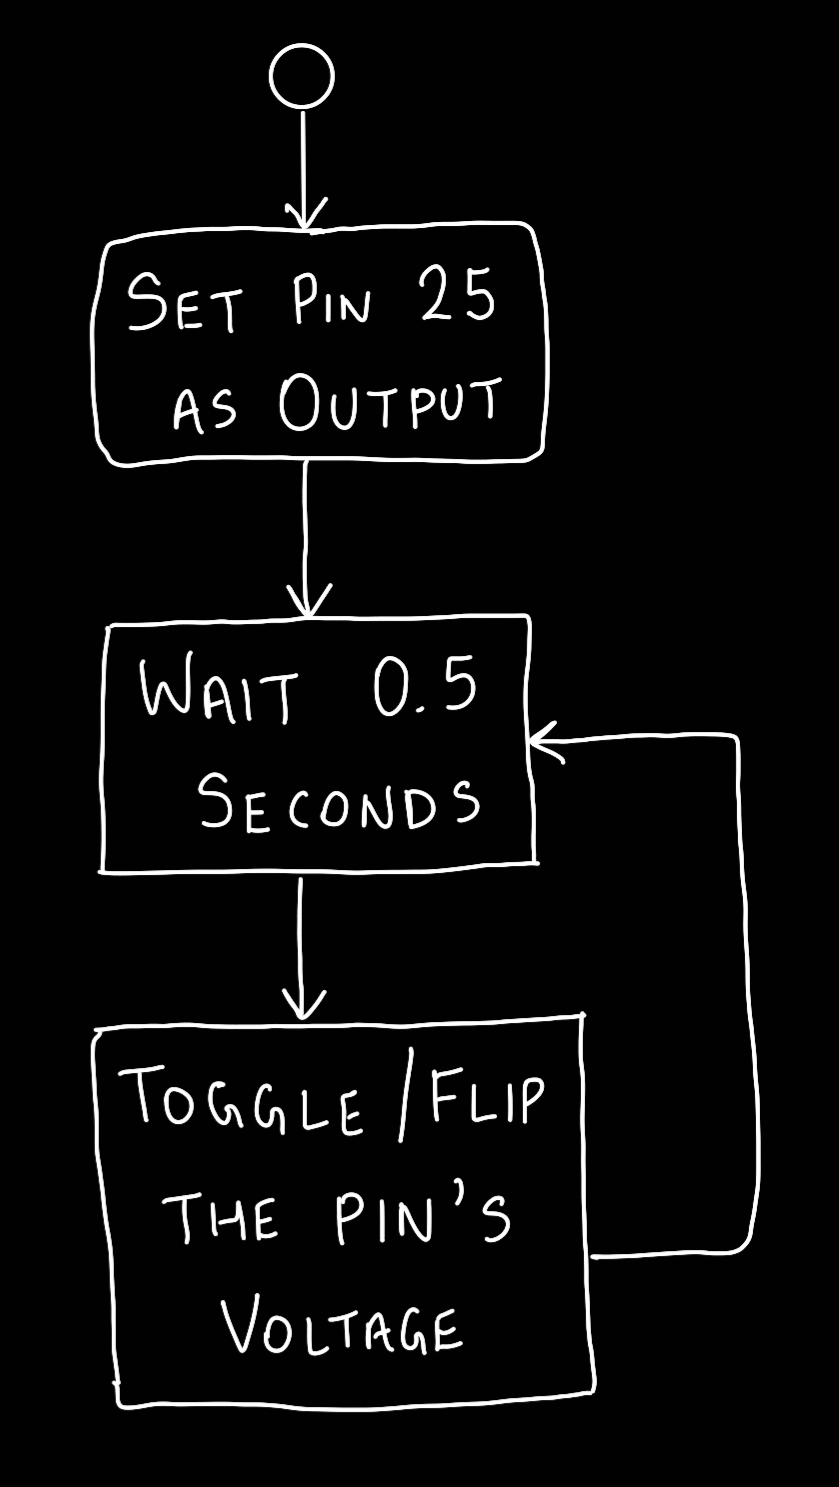
In order to blink this happy little diode, we need to know two things: how to toggle the voltage on the output pin, and how to work with time in MicroPython. These are accomplished using the machine and time libraries, respectively. Before we write the code, it is helpful to visualize by drawing a flowchart.
![]()
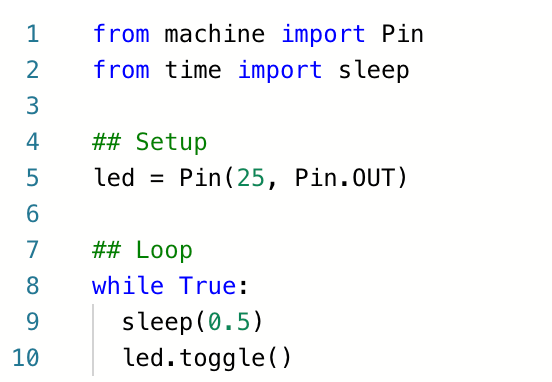
Flowchart for blinking an LED The code to accomplish this in MicroPython is fortunately quite simple. Take a look at the code below, and type it in (do not copy-paste) to your simulator. I can't stress enough that you should type it in yourself - it is the best way to truly understand programming and it's a very important habit to build in your learning, no matter how trivial a piece of code may seem. After you type it in, press the 'play' button to run the code and see your result!
![]()
Yes, I did just post the code as an image to prevent copy-pasting. Shame on you for trying. In the first two lines, we import the libraries we need. When using MicroPython with any kind of hardware, you will basically always need the machine library as it provides...
Read more »
 Lutetium
 Turo Heikkinen
 Sean Hodgins
 Alvaro Villoslada
 Timo Birnschein
 Nixie
Nixie Uri Shaked
 Sam Smith
 Ever
Ever Sophi Kravitz
 Michael Barton-Sweeney
 skuhns
 Casual Cyborg
 Jasmine Brackett
 Jan Szumiec
 Jon
Jon