

 Craig Hissett
 Sophi Kravitz
 Stefan Lochbrunner
 deʃhipu
-
LattePanda Portable Music Studio
07/23/2023 at 22:34 • 0 comments***This is a writeup of my project featuring the LattePanda 3 Delta, kindly provided by the LattePanda team in order for me to explore my project. All LattePanda Accessories were purchased separately***
My name is Craig HIssett, and I am a software developer for an education provider based in the North East of England. Outside of the office I am also a musician, playing trombone, guitar and other instruments.
I am a hobbyist maker, heavily using Raspberry Pis and Arduino microcontrollers in the vast majority of projects. I use YouTube quite regularly to keep abreast of new SBCs coming onto the market. I saw a review on the original LattePanda and its ability to run Windows natively and have been following the releases since. I’ve also purchased other products from DFRobot over the years, such as the Devastator Tank Chassis, for various projects.
Covid-19 was the main driving force behind this project. Lockdowns closed music venues and recording studios across the UK, forcing musicians to perform or produce new music from home or in open locations. I record music not just for my own band, but also session work for several other bands. In order to be able to record from home or on location I wanted to create a portable setup that acted as a ‘studio in a box’. This box had to let me quickly set up to record a number of mics, be simple to work with, and make it easy to transfer the recorded results to another computer for editing.
This is the result of my efforts - the mobile Recording Studio!
![]()
The Behringer UMC1820 is a fantastic audio interface, giving me 8 recording channels (with the option to expand in the future) to be able to record anything from solo artists up to a small ensemble or a full drum kit for a studio session, two headphone outputs on the front for situations where I am recording another performer and a host of other outputs for linking this system up with PA systems and such in the future.
The LattePanda is key to making this project easy. Its windows operating software allows me to run Reaper, my DAW of choice, with it’s files synced via OneDrive. This workflow makes it so easy for me to pick up recording files at home on my higher spec laptop for editing. I also use window’s native Remote Desktop Client to access the LattePanda from an old Microsoft Surface or tablet, or even my phone. IT makes it so easy to control. For recording on location where there are no access points I use the USB network streaming cable to connect the LattePanda to my phone, allowing for that network connection to still work.
The 4u case keeps everything in one unit for easy transport. One downside is it makes accessing the Behringer’s back inputs difficult, so I have created a custom input panel on the front of the case. This panel makes it easy for connecting to inputs 3-8 on the Behringer, the two main outputs, and also the network cable of the LattePanda. Eventually I’ll expand this to breakout the LattePanda’s HDMI and power button too.
The final feature of this unit is my built in effects unit – another project of mine was using a Raspberry Pi and an audio HAT as digital pedalboard for my guitar playing and tromboneering. This Pi is controlled via a USB MIDI footswitch. I decided to take the Pi and put it in my studio case alongside the LattePanda. It has two inputs and two outputs, so I have taken inputs 7-8 from my front panel, routed them to the Pi, then back to 7-8 on the Behringer. I am going to network the LattePanda and Pi together via ethernet, as my Pi can be controlled via a Web GUI, meaning I can remote into the LattePanda and control everything in this rig.
Hardware
- LattePanda 3 Delta
- LattePanda Titan Case
- LattePanda Network streaming cable
- 512Gb SSD
- Behringer UMC1820 1u audio interface
- Raspberry Pi 4 (4gb)
- Pisound Audio Interface for Raspberry Pi
- 4u shallow studio rack case
- 1u shallow shelf
- 1u power distributor
- 1u custom IO panel
- 6 x panelmount XLR female passthroughs ...
-
Product Review | Totem Black Spider
07/13/2021 at 14:16 • 3 commentsI have been a big fan of Totem products for quite some time; they have some fantastic construction 'maker' kits which have proven extremely useful to me for prototyping many projects, and I have been invited to test some of their other kits in the past, varying from mini lab setups to robots.
Very recently I applied to become a Global Team Member for Totem, and was overjoyed to be accepted as an ambassador. This gives me a fantastic opportunity to continue to work with Totem and continue to share some reviews and thoughts on the stuff these guys are working on, and to help spread the word about these fantastic kits amongst the maker community.
***Disclaimer*** - all thoughts and opinions on the products are entirely my own, and are in no way influenced by Totem.
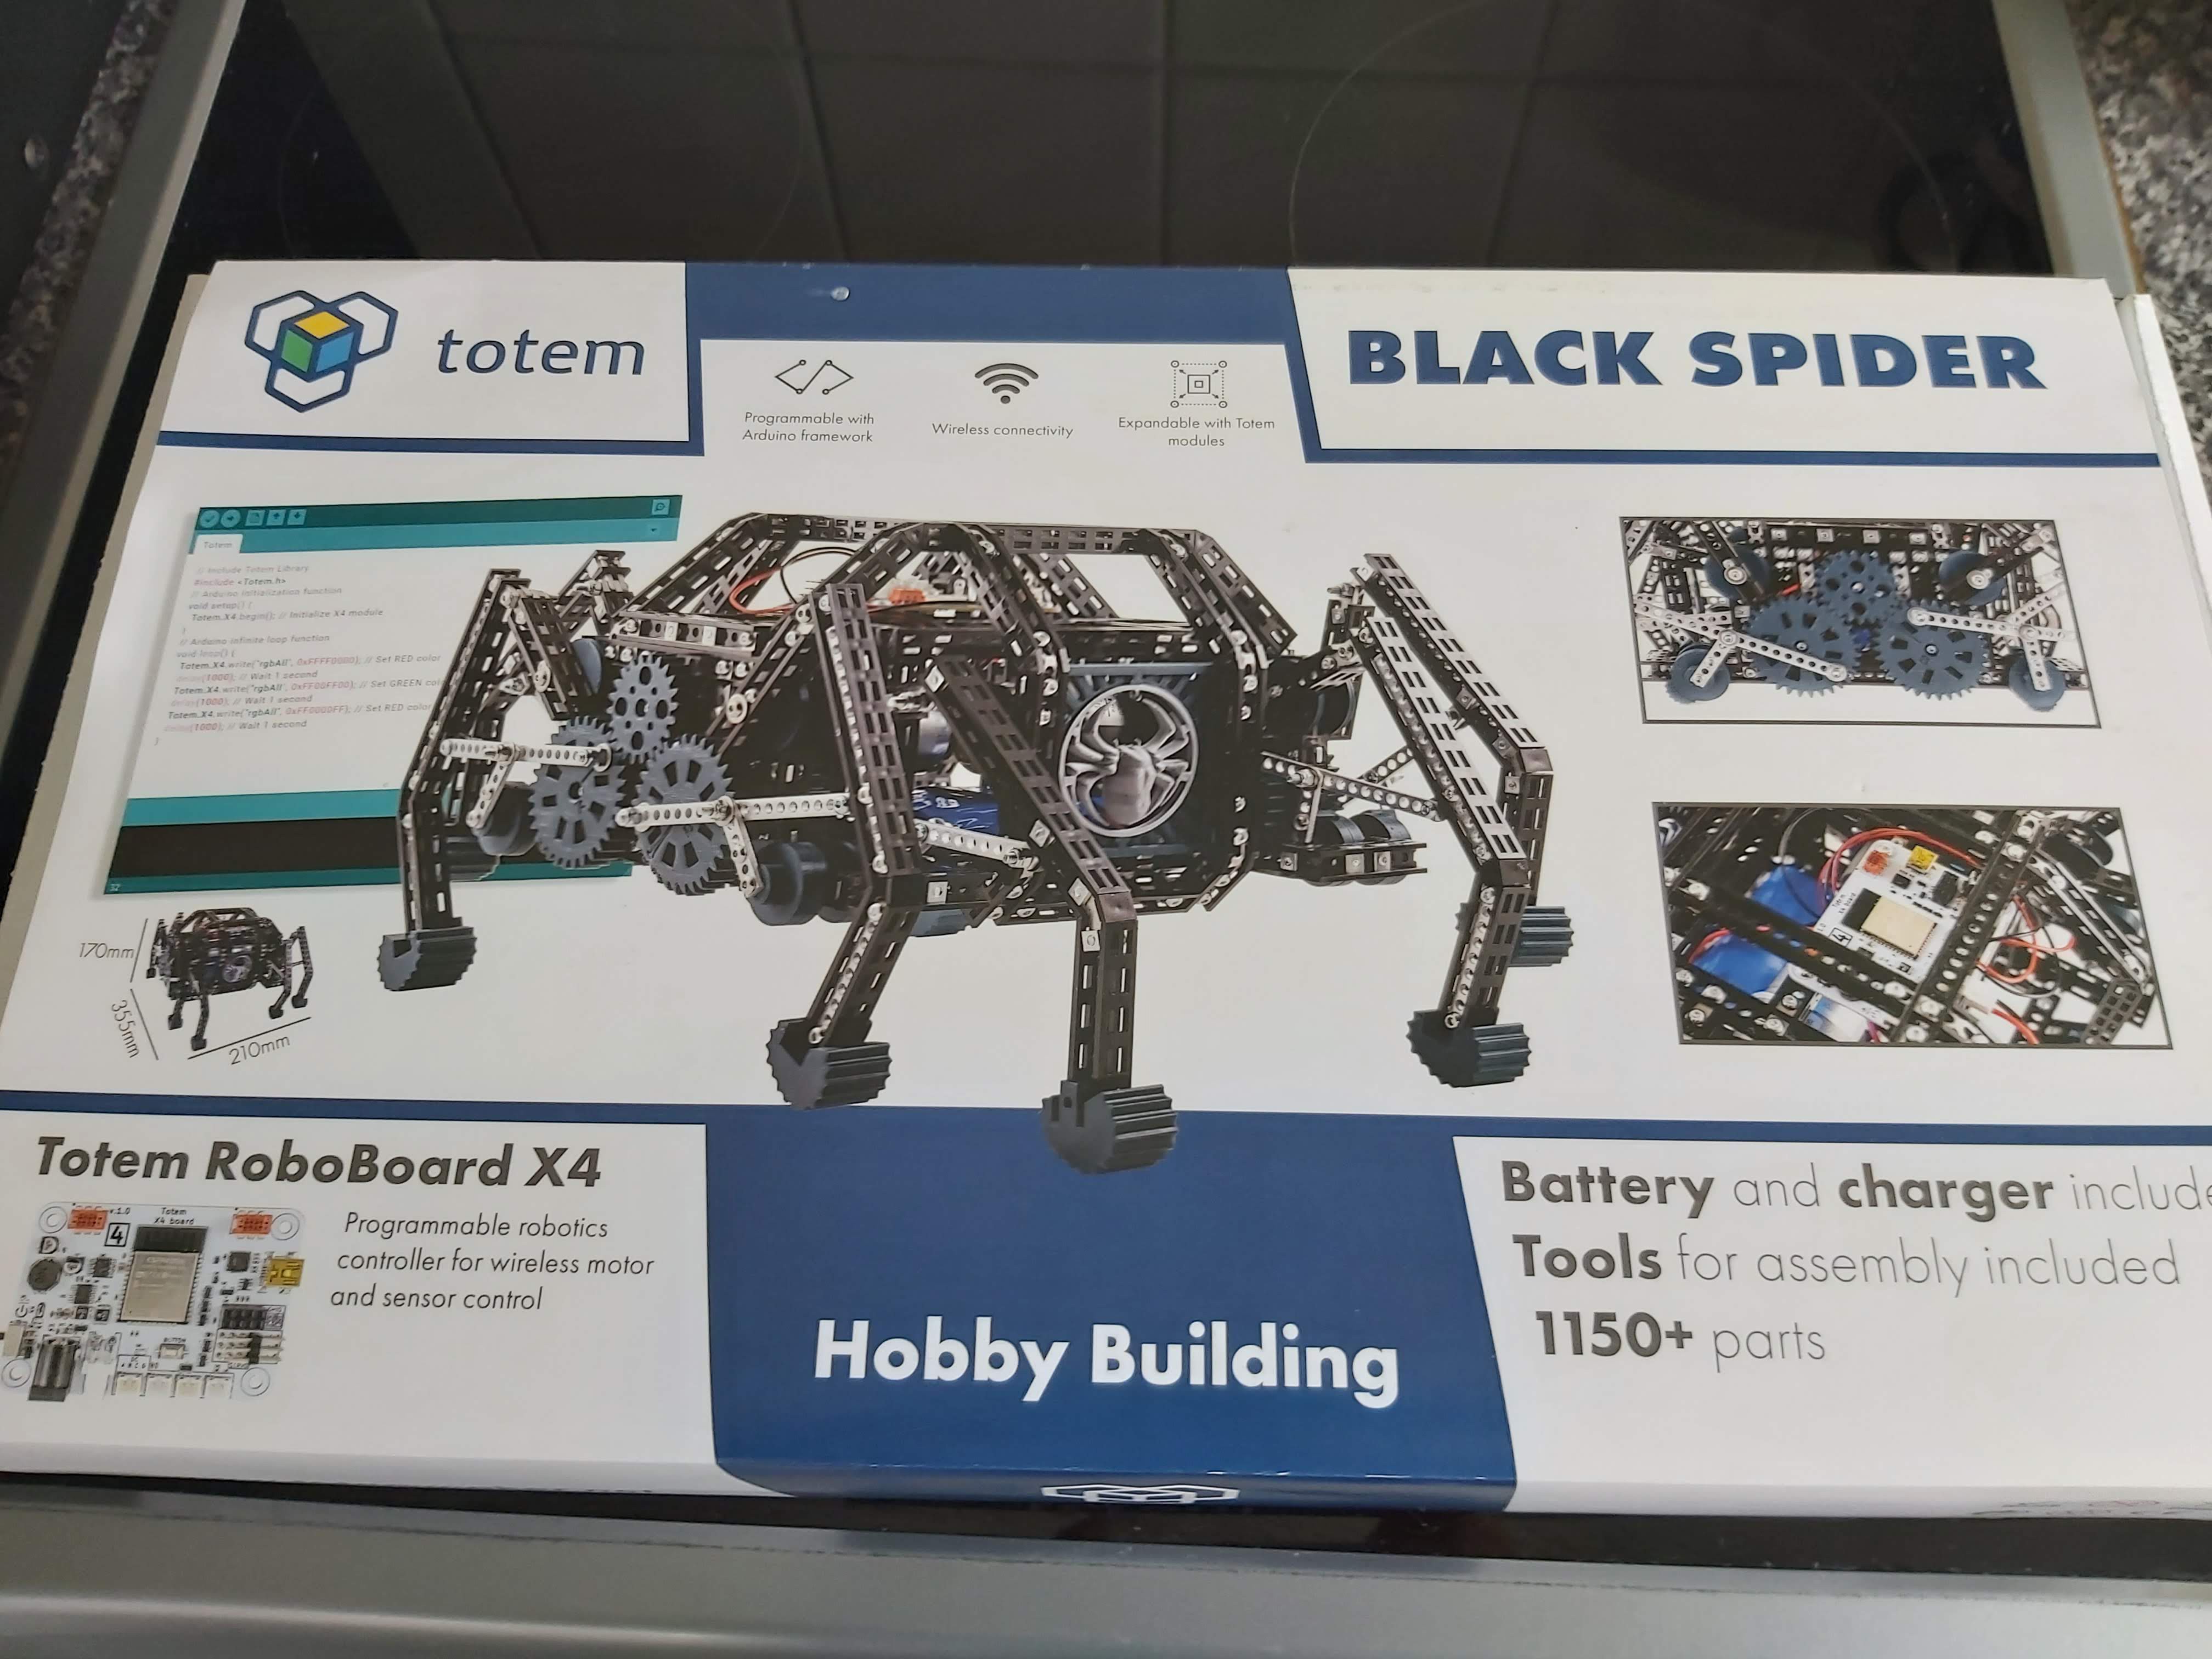
Now, on to the first kit I have been sent to review - the Black Spider robot kit!
The Product
The Black Spider robot is a fairly recent addition the kits available on the site, and once built creates an 8 legged robot using two motors to power the walking movement. At the heart of this robot is a custom Totem microcontroller and is powered by an onboard rechargeable battery pack.
I was really excited to get the chance to get my hands on the release version of this kit, as I had previously sampled a prototype build of the kit some time ago and I was keen to see what improvements had been made to it from that stage.
The biggest and most exciting change for me was the microcontroller upgrade; the version I had used the X3 version of the microcontroller, which only worked with the Totem smartphone app. Now the kit features the X4 version of the controller, which is built around an ESP32 module and can now run Arduino sketches and could possibly run micropython with some effort. There are also some GPIO available too, in addition to the 'BUS connectors' used to connect various Totem modules to the controller. I'm itching to see if those can be used as a software Serial port via an arduino sketch to allow for communication with a Raspberry Pi or similar SBC. This thing is screaming out to be given some kind of machine learning capabilities.
On to the unboxing!
Unboxing
Upon receiving my package I opened it up to be greeted by this imposing, impressive thing:
![]()
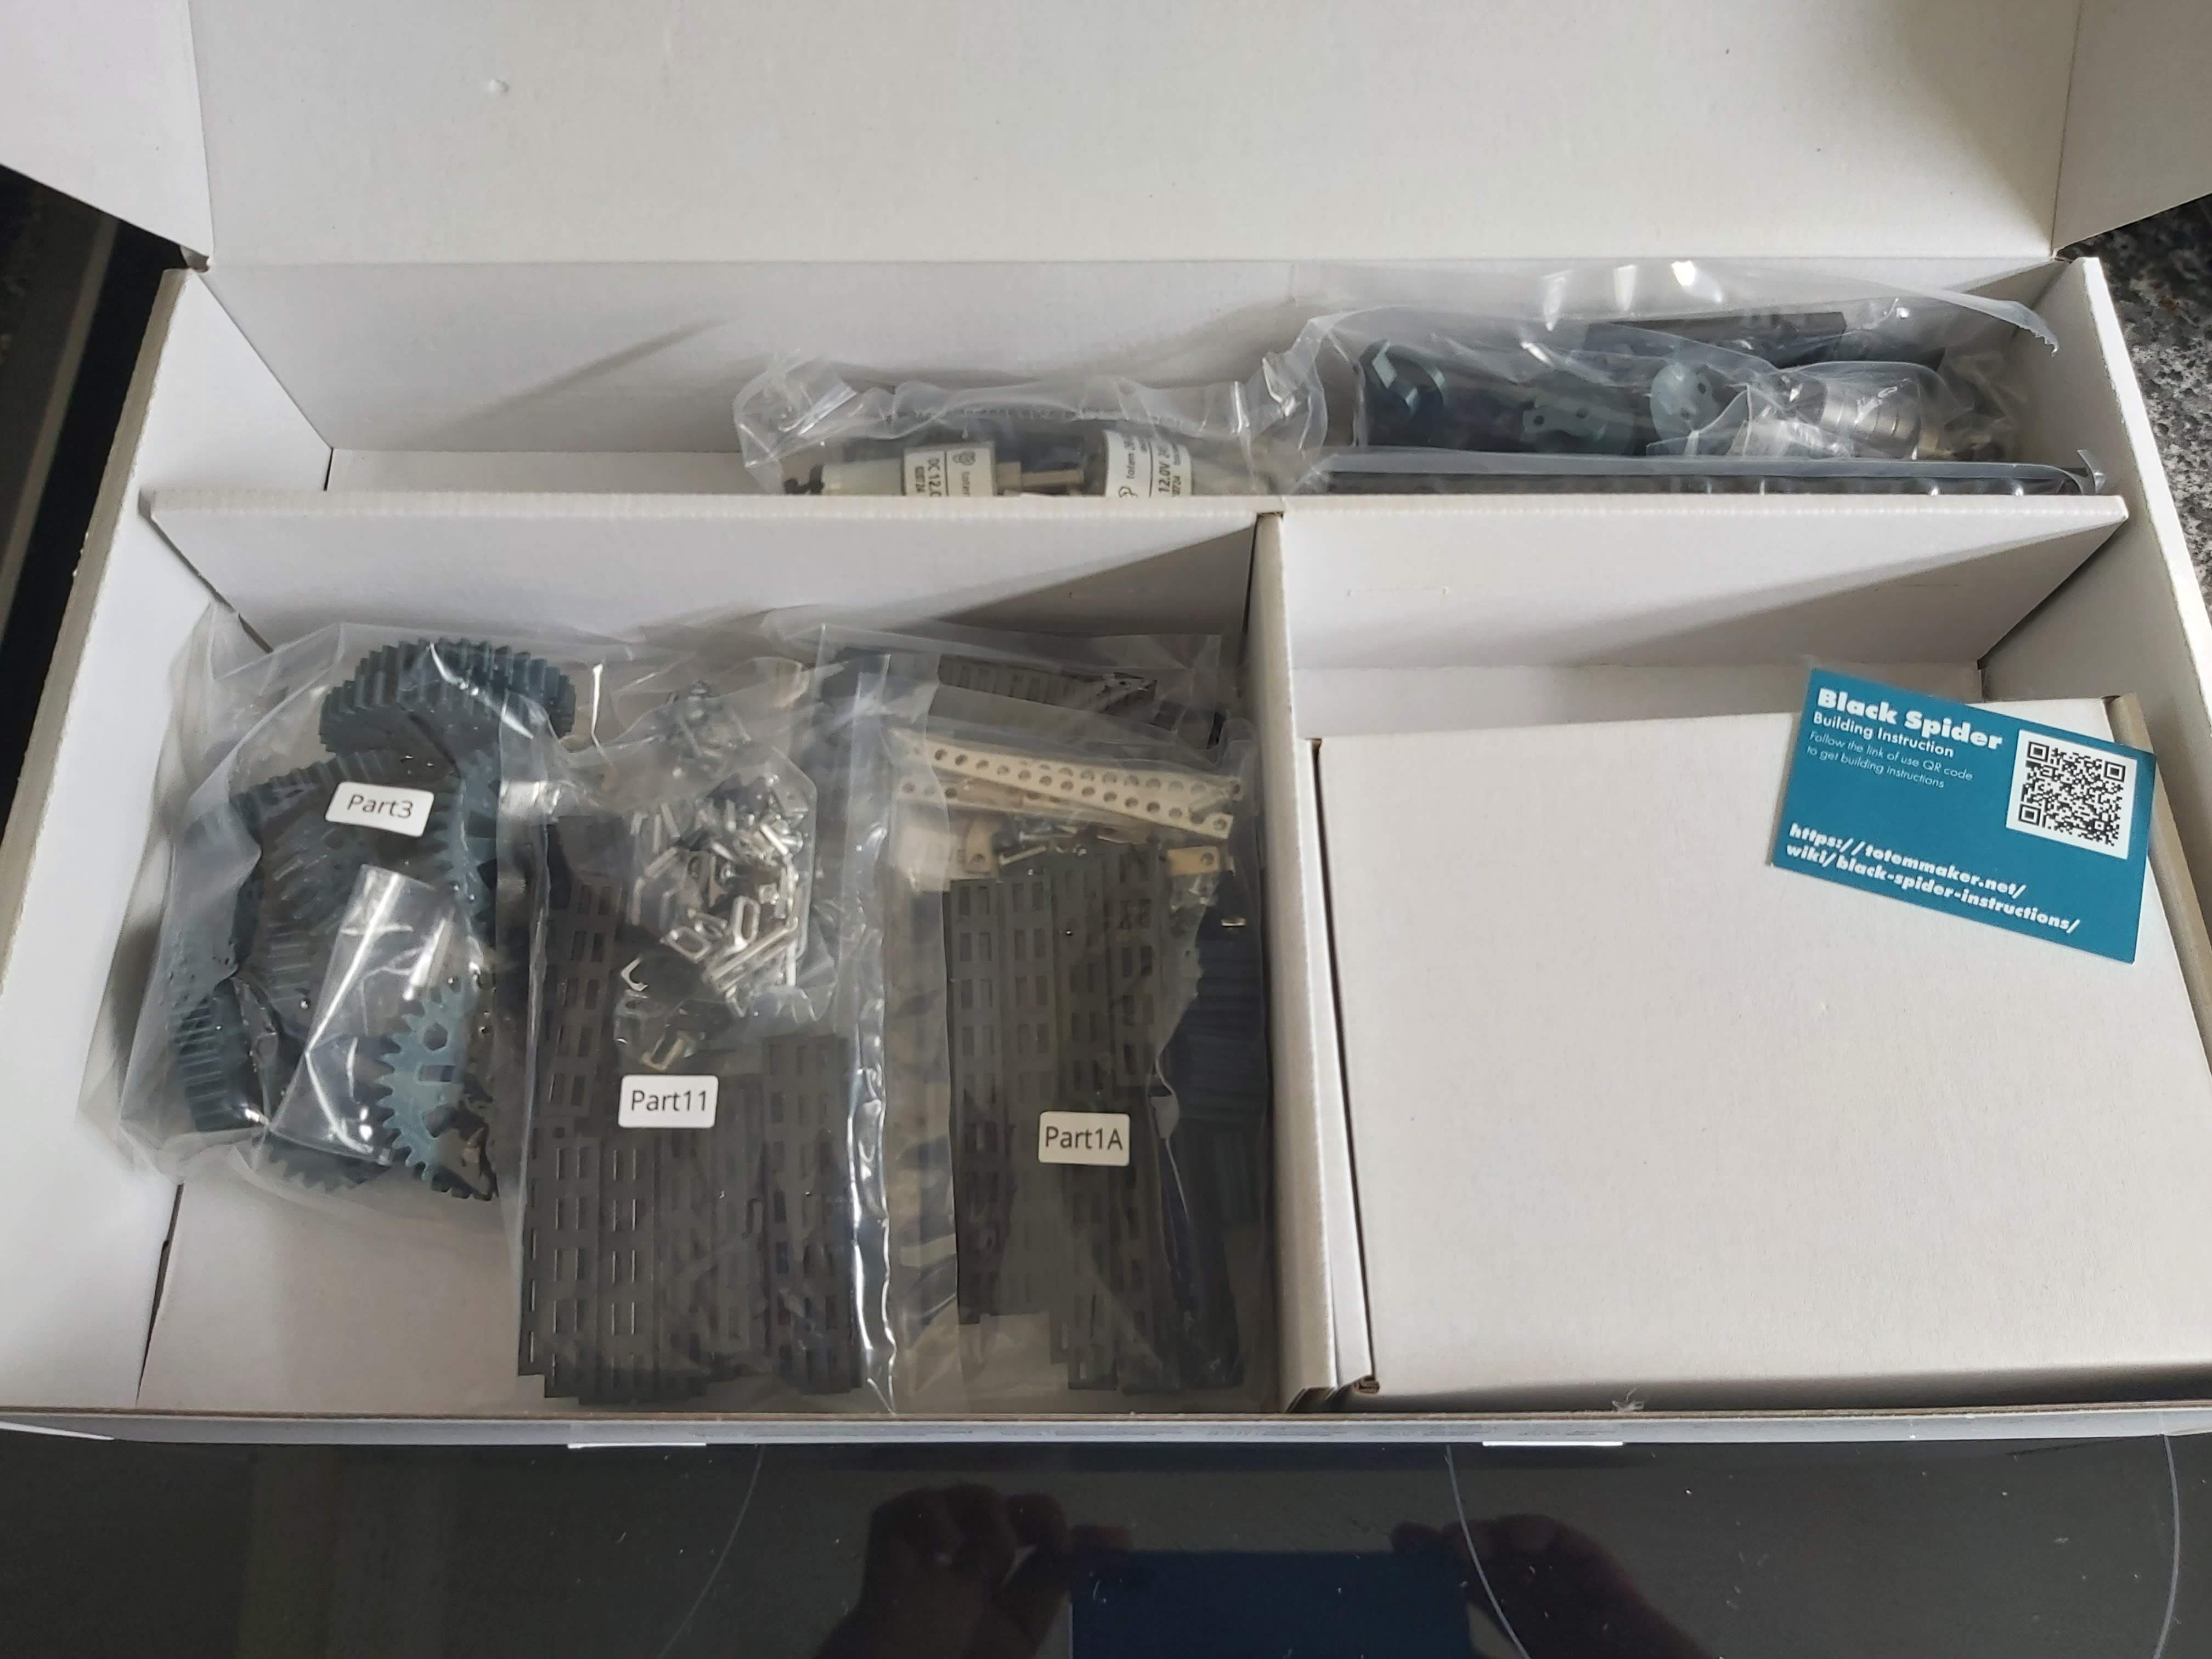
1150+ parts. It's a big old kit! :-)
On first glance it looks as though the linkage system used to transfer motor power into leg movement has been revised, which is great to see. My prototype kit had a few sticking issues with the mechanism and I think it was due to some extra framing around this mechanism. I'm keen to try revising my prototype model to see if I can reflect the changes seen in the released model!
![]()
![]()
![]()
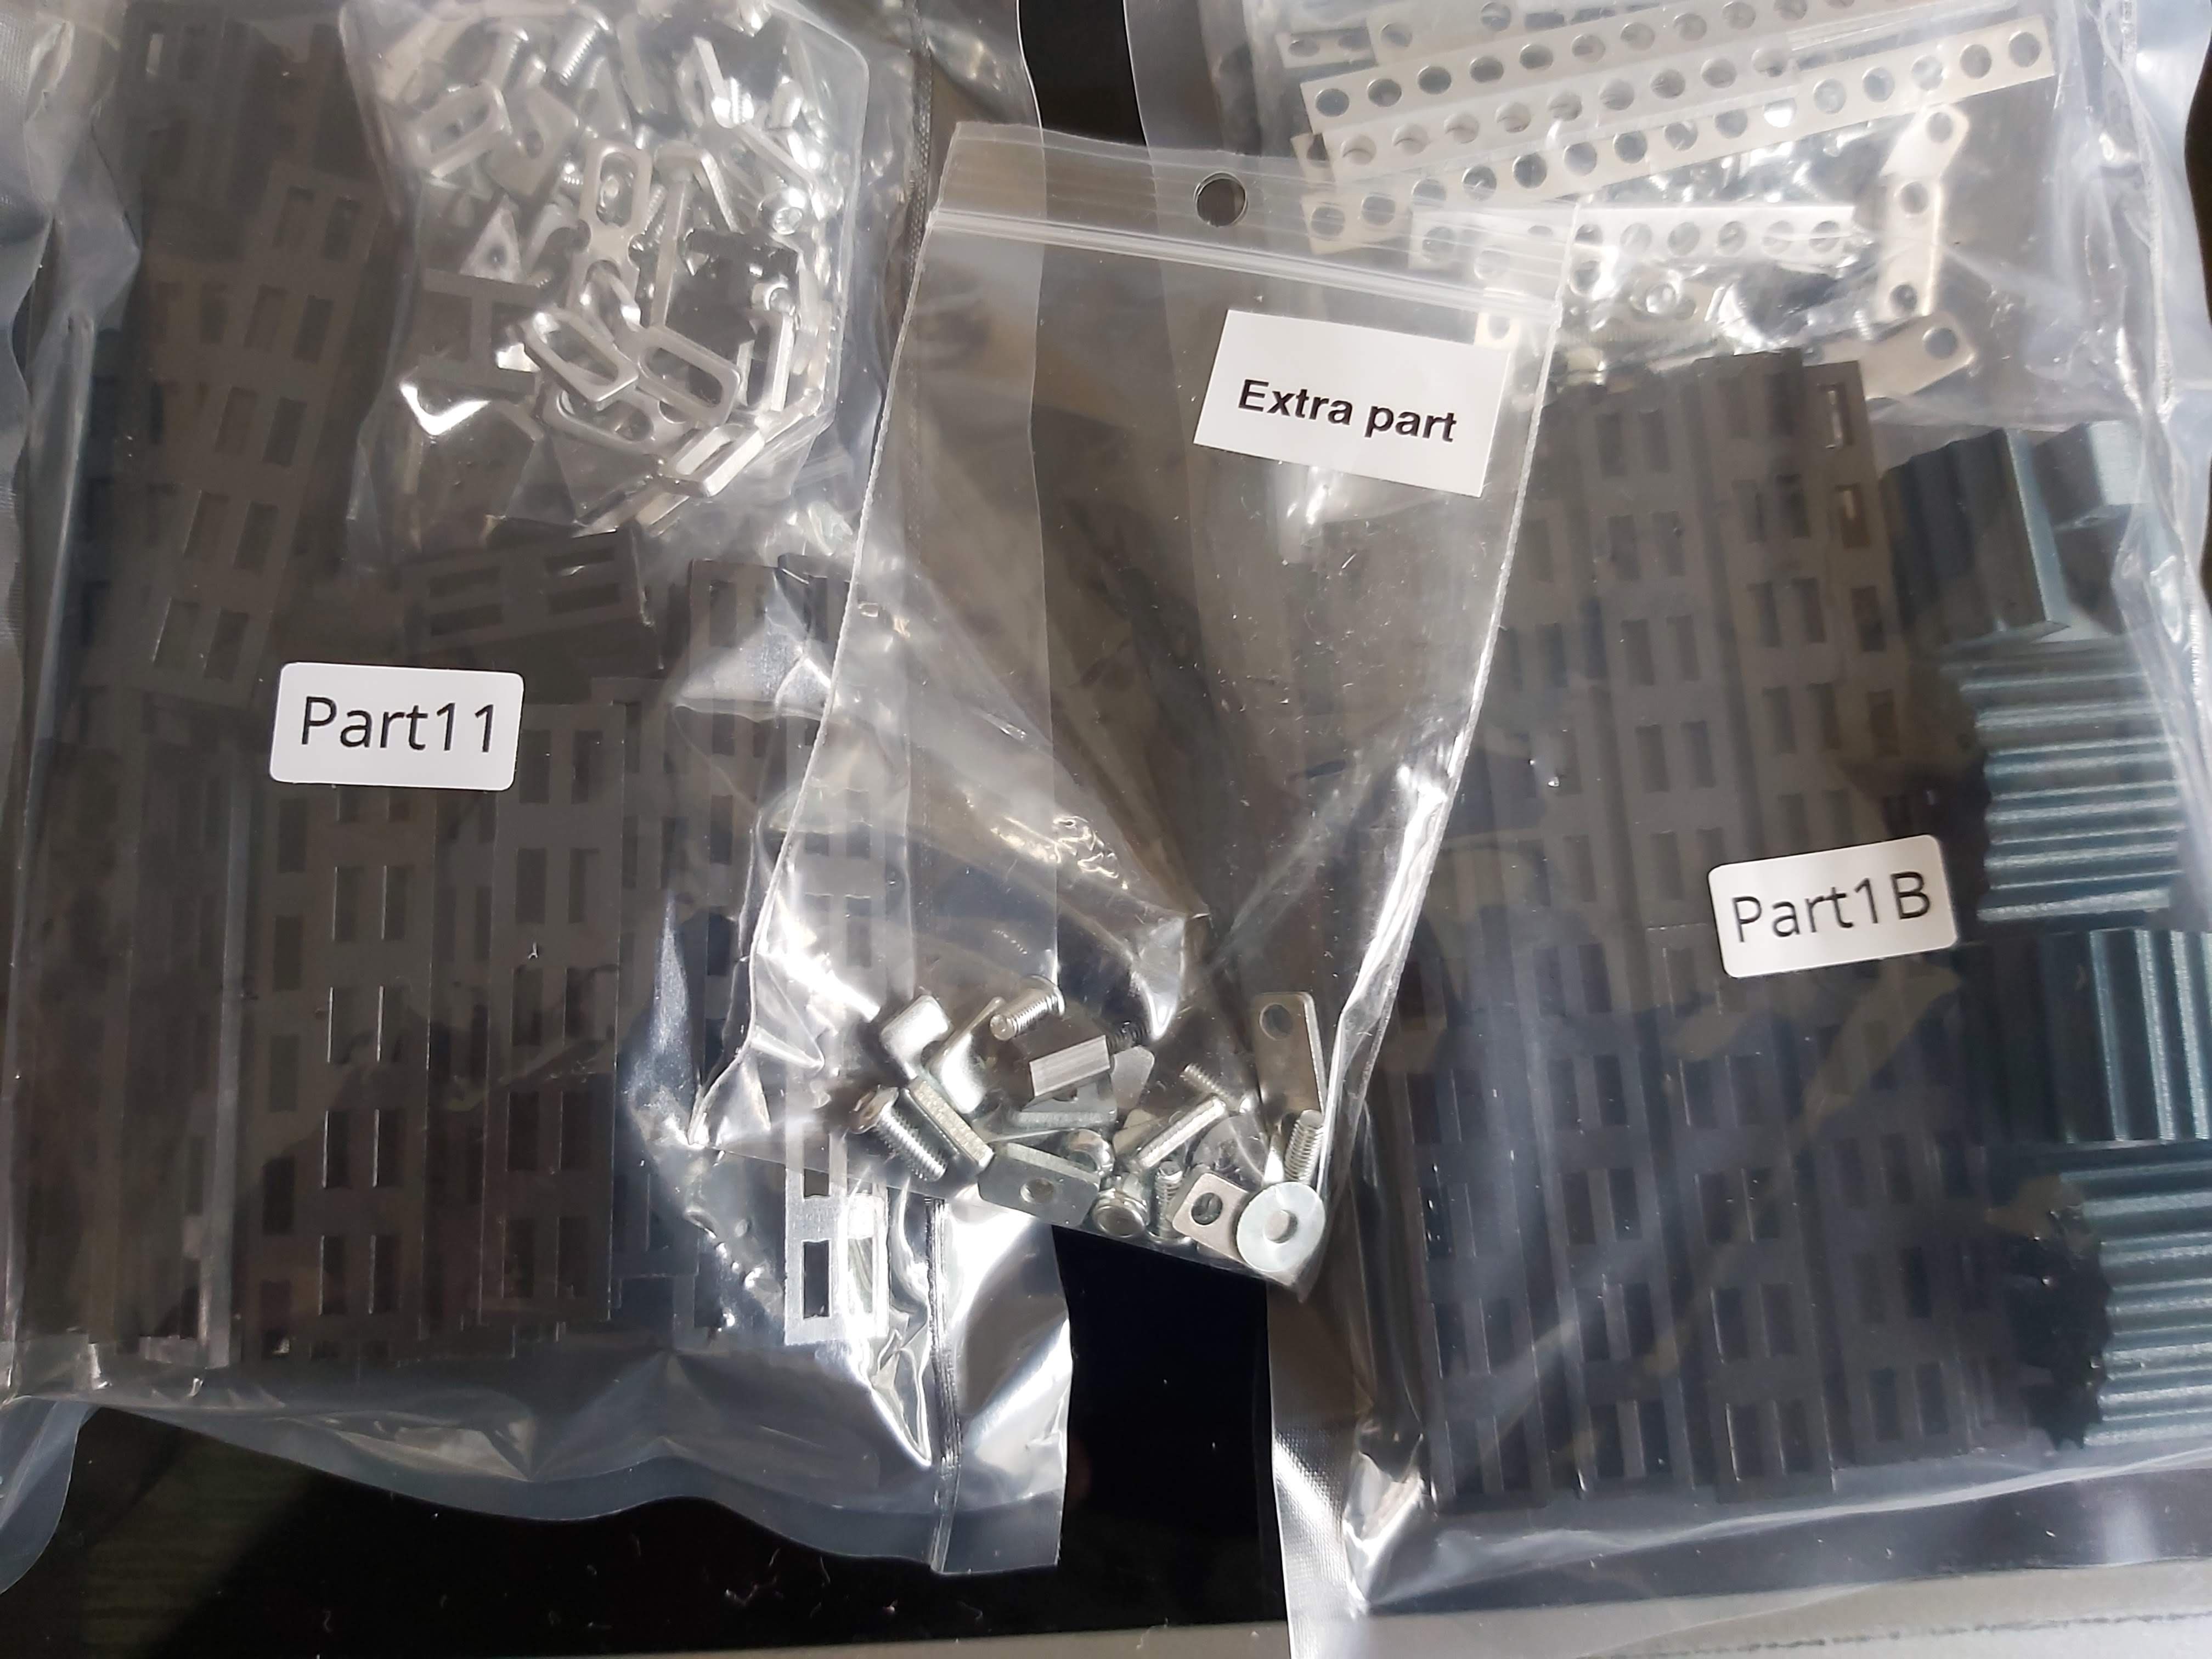
Inside I was pleasantly surprised at how organised the parts were; each construction step is packed into it's own little bag, meaning there'll be no lego-esque 30 minute pre-build sorting going on before building it, ha ha ha.
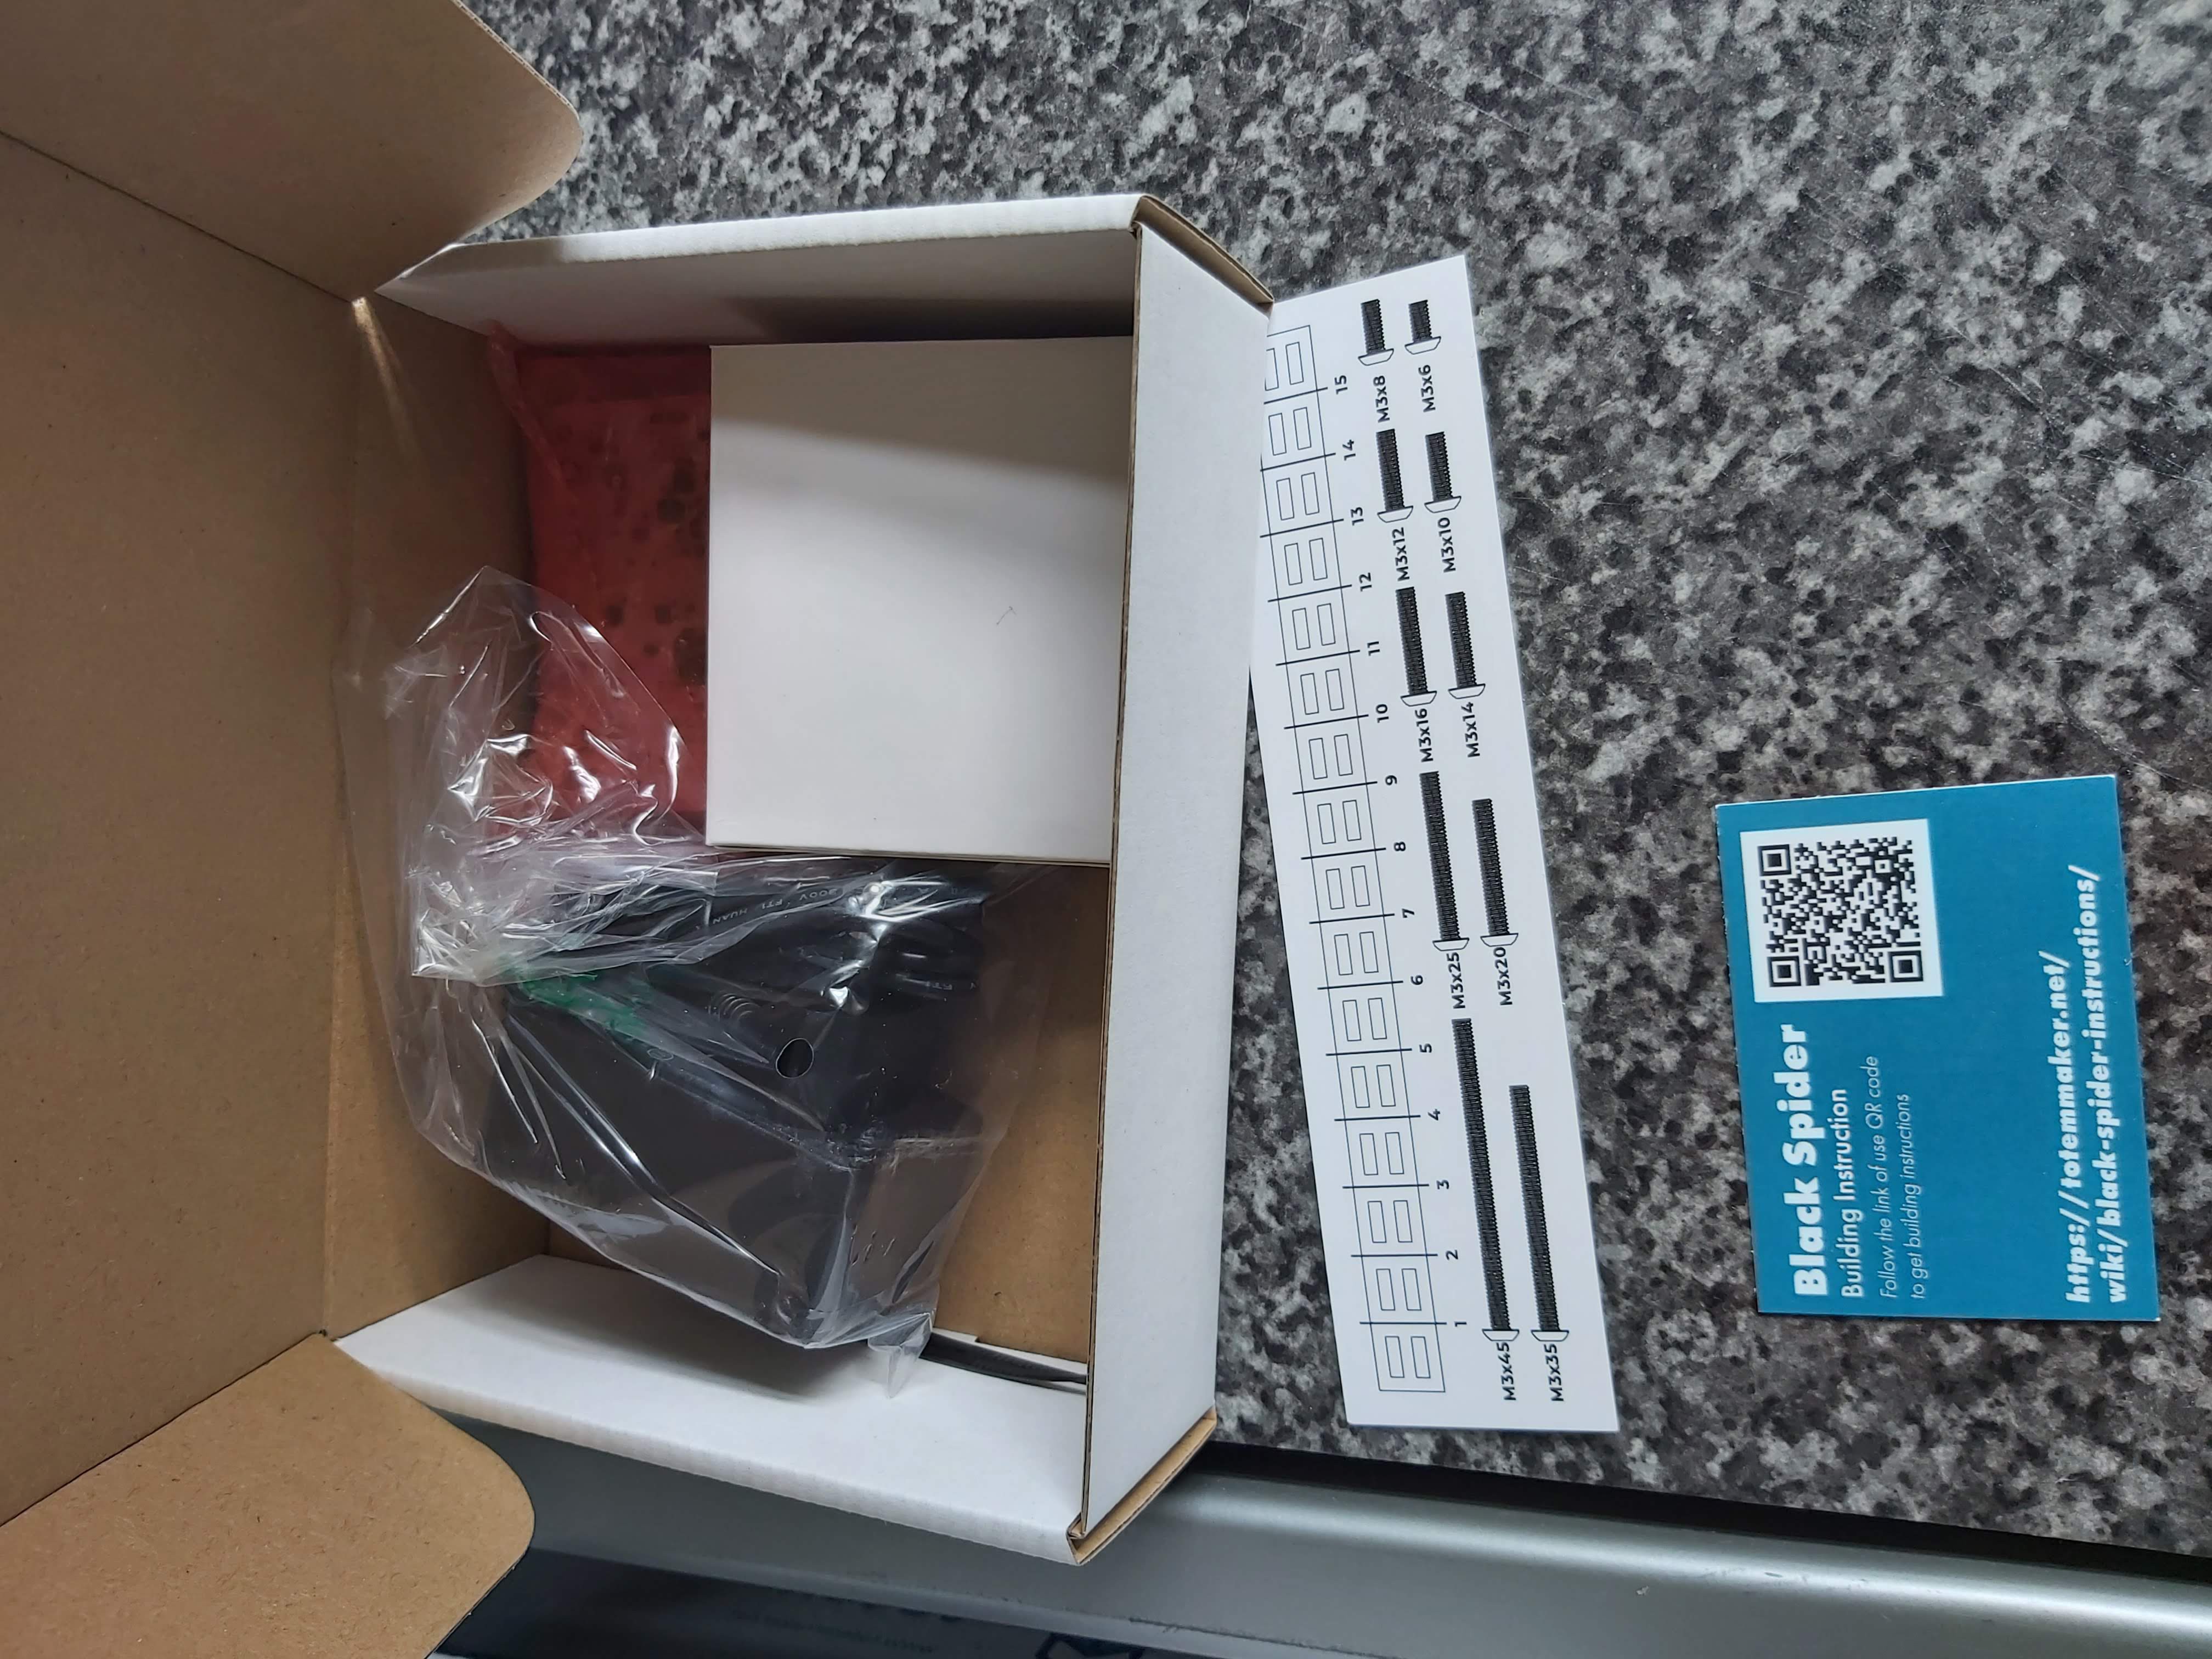
The inclusion of a size guide was helpful too, just to speed up the identification of similar lengths of beams and screws.
There's no bulky manual to accompany the kit; they include a little card with a smart code on to scan and it takes you to a link on their site where the instructions are found. This is something I like about all the Totem kits; their manuals are all available on their wiki, so there's no paper waste and it's also possible to build other things if you have the maker kits.
Assembly Phase 1 - [Added 27th July]
So far I've been able to put together the first few steps, fitting little 20-30 minute segments of building in where possible. Ideally you should put aside bigger chunks of time, as you lose a lot of time getting everything out and organised to crack on and also packing things back up, but I lack the ability to plan my life that way, ha ha ha.
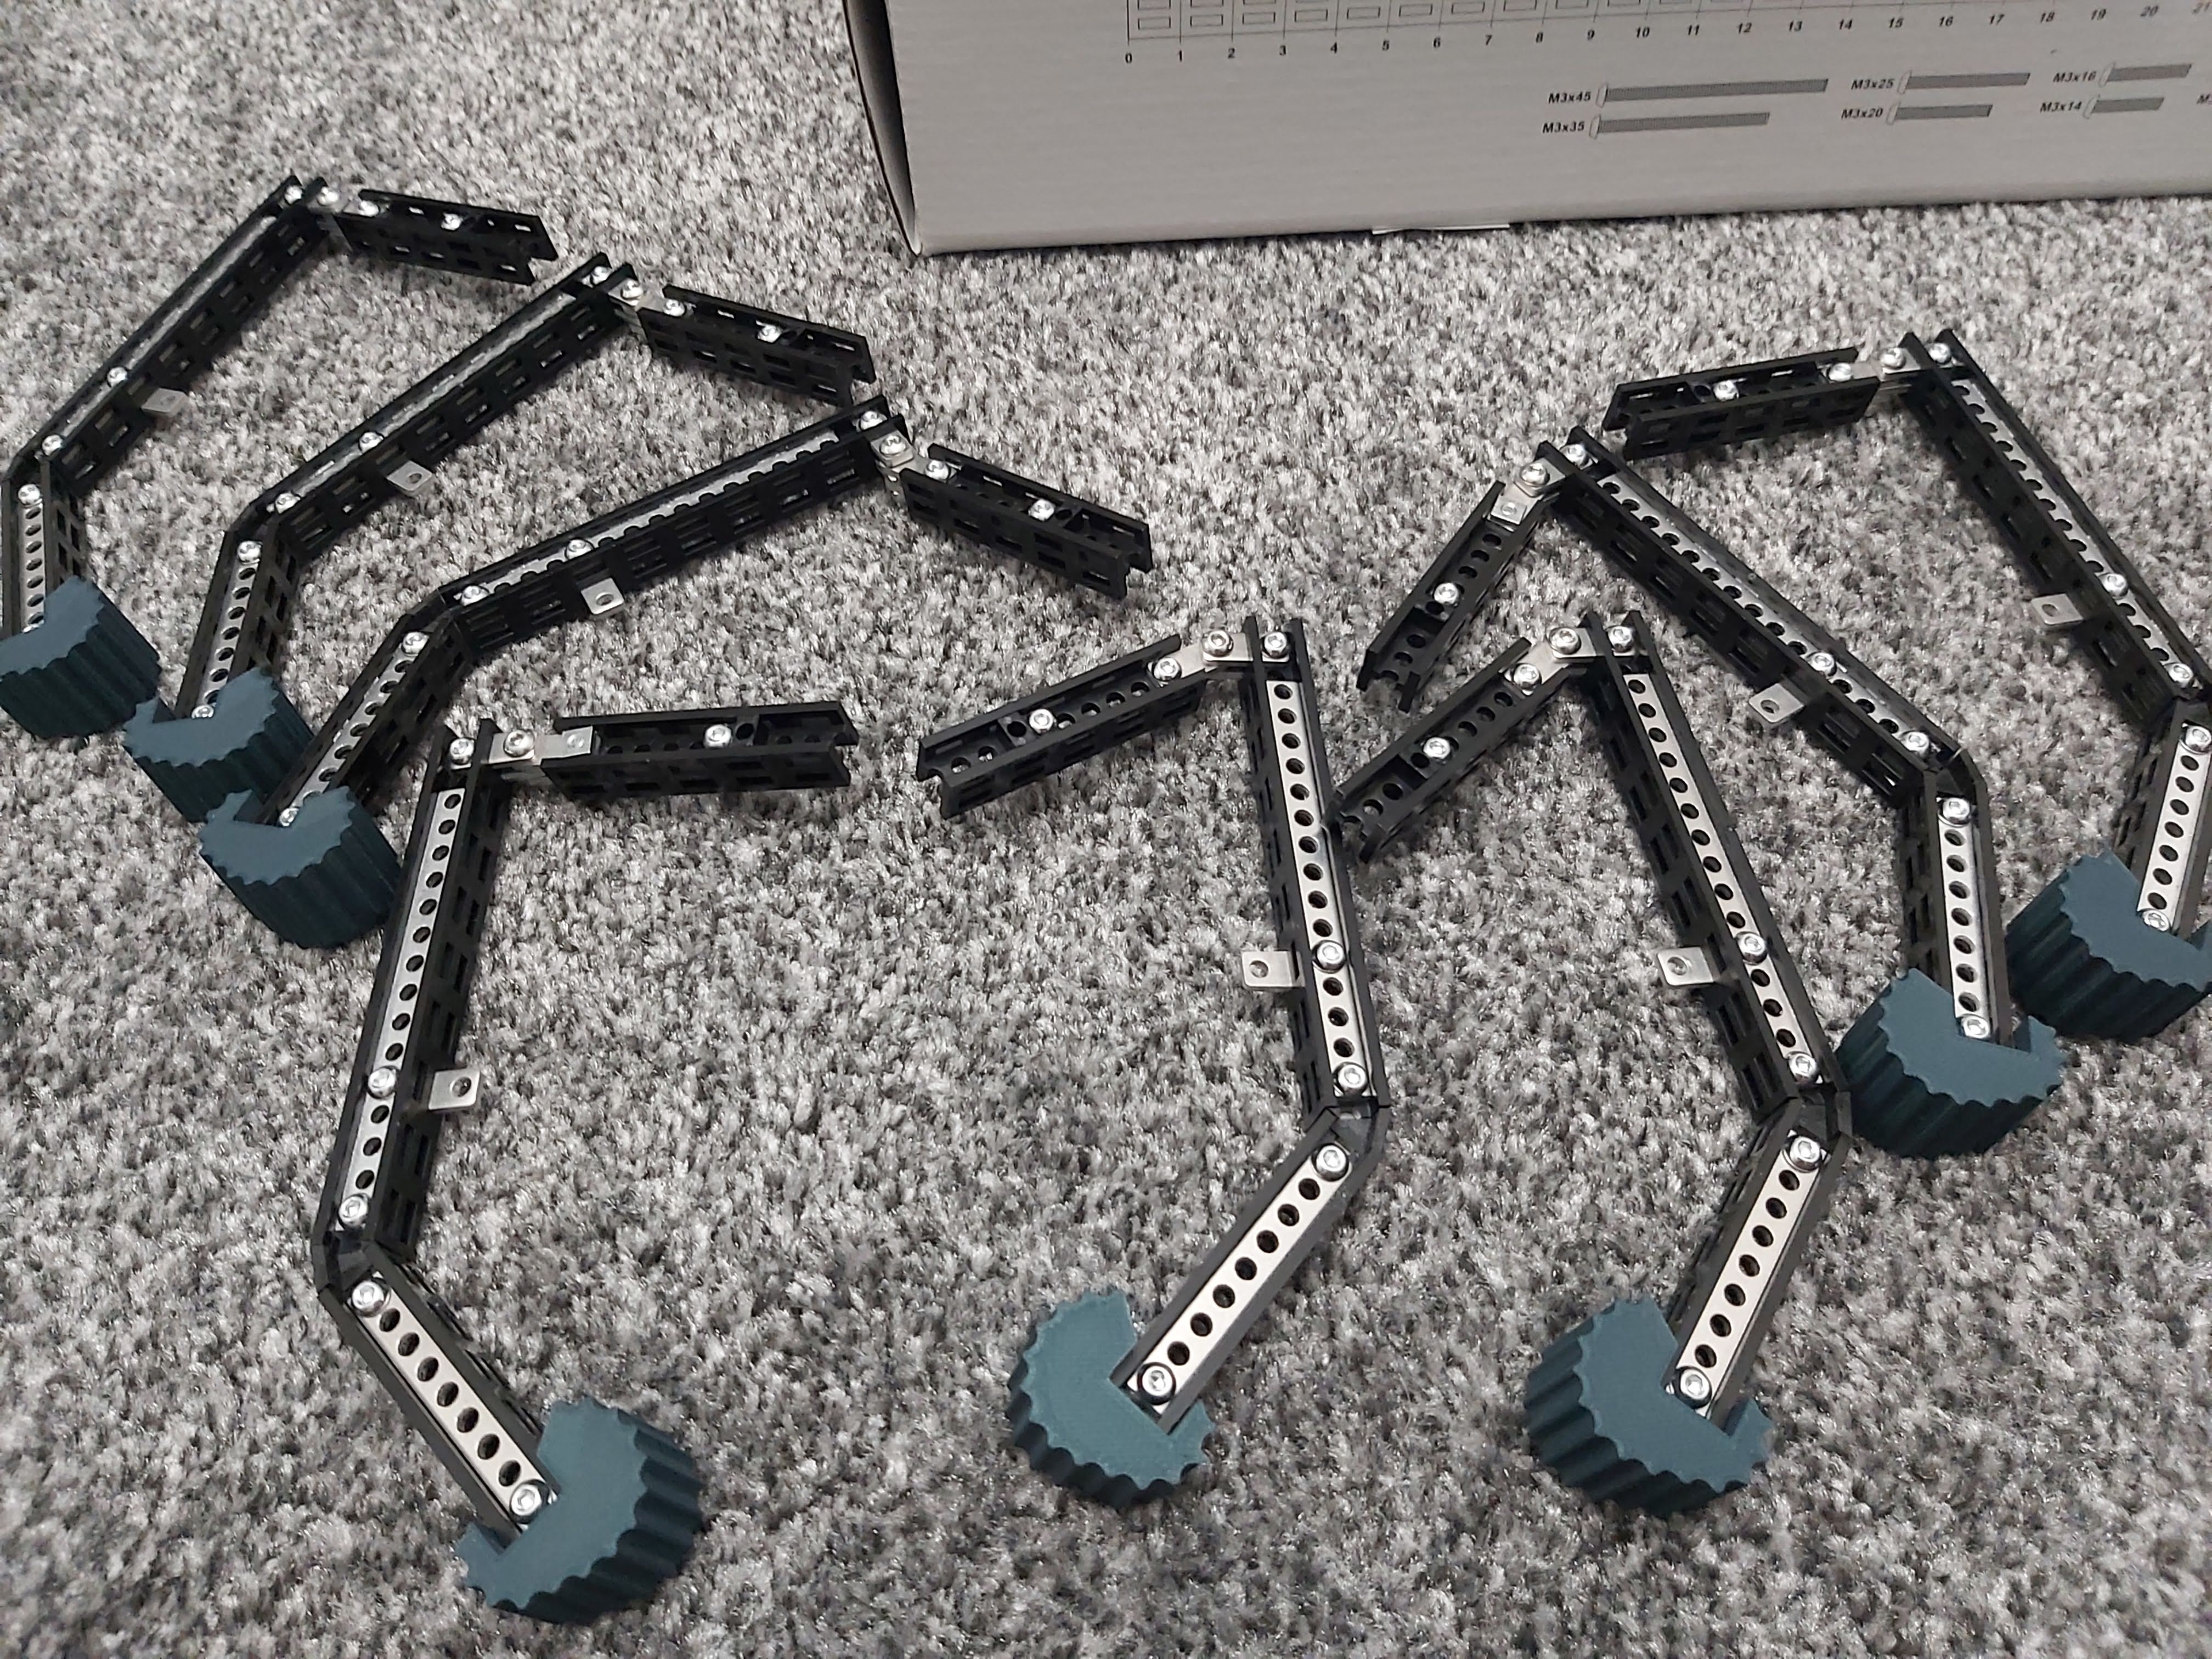
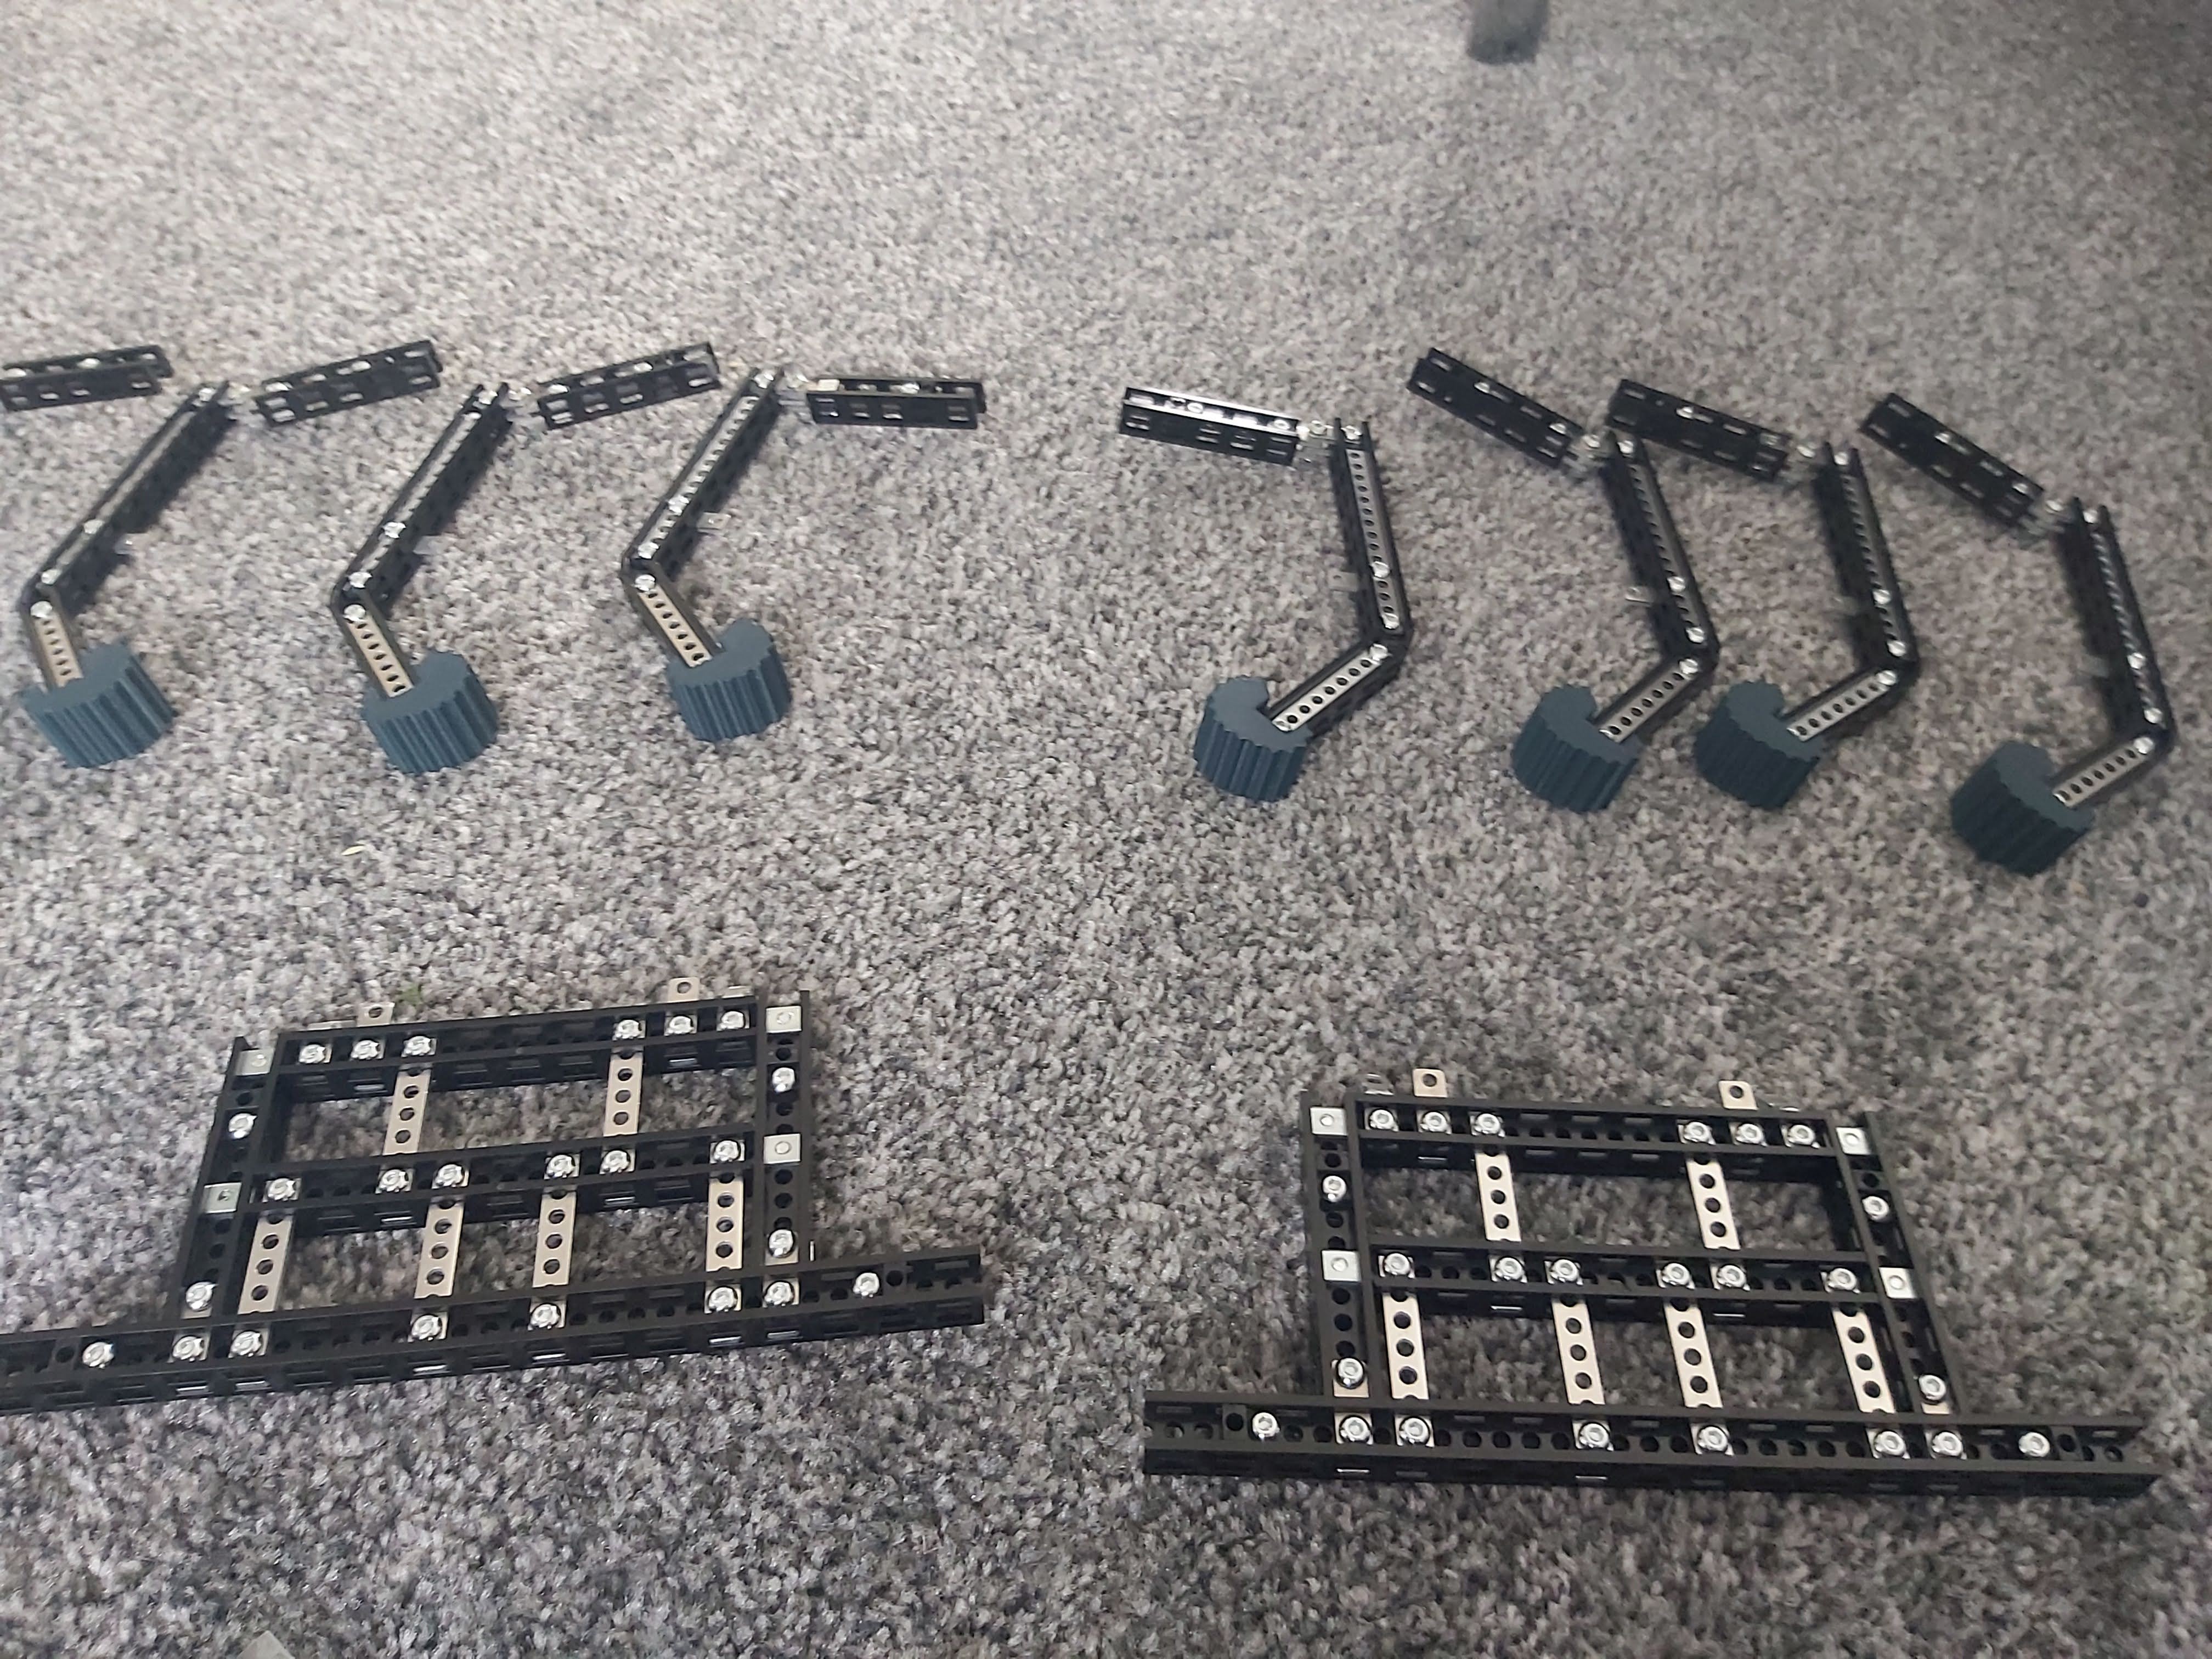
So far, so good! I've assembled the 8 legs, the sides of the body that hold the gearing for the motors and begun adding the gearing.
![]()
![]()
The legs are nice...
Read more » -
Drilling my own enclosures
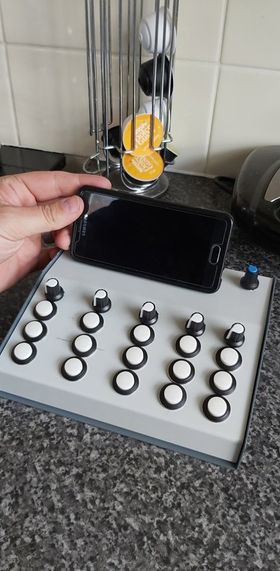
09/02/2020 at 16:49 • 0 commentsJust a quick post about a little project I'm doing for buddy of mine. Normally I never really get my hands dirty with enclosures (I suck at them, and have no patience for the learning curve ha ha), but when assembling a mini test rig for the project I decided to give it a go.
Pretty bloody happy with the results! A few buttons are slightly off thanks to drill bits jumping (using a nail as a centre punch isn't brilliant) but overall I'm really happy.
Next up I need to wire up the encoder, five pots and the encoder, mount an Arduino Mega and Pi4 4gb inside, cut a hole for a panelmount USB port to power the Pi and add a phone holder on top.
![]()
It's sad how pleased with myself I am ha ha ha!
My Projects
My Pages

Projects I Like & Follow
 Chu Tien Thinh (obitvn)
 Kaushlesh C. ( KD9VFU )
 jefmer
 Garra
Garra mkdxdx
 Matt Deeds
 Brent w
 Mx. Jack Nelson
 Nik Reitmann
 Guy Dupont
 Alexander Kirillov
 hesam.moshiri
 Ethan Russell
 Patrick Tait
 Nathan Orick
 Ale
AleShare this profile
ShareBits


Thank you @Dixbit ! Great project. I'm wanting to create an arduino handheld around a mega, with the Uno pin portion left unpopulated to receive shields and the mega-specific pins to be used for input devices and screens. Your format is giving me some great ideas!

Hi Craig! Thanks for liking and following my #Megadrive PC and #TankServer projects!

Hi Craig, thanks for your interest in my #PoE-FeatherWing!


Hey Craig! Thanks for the Scull & for following #Workbench Assistant !! Let me know if you'd like to see any changes or new features if you have a sec to spare. All the best to you!
Many thanks for liking the projects on my 2019 HaD prize project list.

Hello Craig! Thank you for following my #Featured Projects list.
You're more than welcome buddy.
I'm fascinated by this project, I love the dual esp32 setup.

Thanks for liking https://hackaday.io/project/157456-modular-humanoid-robot-marb, Craig!
Thank you for liking and following my #wESP32: Wired ESP32 with Ethernet and PoE project, I appreciate the support!
You're welcome buddy. It's a great board; can't wait to get some if/when they become available.
Please check out my projects and give them a like if you may :-)

Thanks for liking and following my project The Squid! Bluetooth motor control module.
You're welcome matey!
Feel free to check out my contest projects and give them a like if you may :-)

Thanks for following #Open Source IOT Platform . Did you build one?
You're welcome buddy, it's a great project!
I haven't built one, but one day I shall!
Thanks for your like to my project https://hackaday.io/project/86962-lawnmower-robot
You're welcome mate!
Please take a look at my 2018 projects and give them a little like if you like them :-)


Hi, and thanks for following my project #Kids School Control
You're welcome buddy. You have a great set of projects on the go!
Hi Craig! Thanks for the like and following my #Smart, 6 port USB Power meter with 4 port USB 2.0. It's a shame that I do not have enough time because of studying :( But definitely soon I'll post my updates, changes and more test reports.
Awesome project my good man! Get your studies done, get this finished and I'll definitely be one of your first buyers :-)
It's the perfect power supply for a multi-microcontroller/Pi dev setup.

Hey Craig, Cheers for the like on #Brewnel. I've been tinkering with it for years lol, thought it was time it saw the light of day. :-)
No problem buddy! I would love to get into home brewing :-)
I'd recommend a plastic Kettle and a kit to begin with, to learn how to handle the main part of brewing. There's still the actual brew, and bottling/kegging and conditioning I havent even mentioned yet...
That contains the interesting part about hangovers - its got little to do with the amount of alcohol and more with the way it is prepared that counts. This is why 10 pints of lager will have your eyeballs hanging like a bat, but the same in shots or Champagne wont. Its chemistry ;-)
Hi @Craig Hissett! Thank you for liking my #Modular Handheld Retro Computer project :)